For a more detailed explanation on how to sew a button onto a shirt – see my detailed guide
Button's popping off…
How can something so small cause such a major inconvenience?
Especially on your made-to-measure suits & shirts?
You paid good money…
And now have to find something else to wear because of an annoying button.
Going to the tailor just to get a button fixed?
Who has time for that?
Well – you don't have to.
Sewing is a good skill to know…
No – it's not feminine.
You think Rambo stitching up his wounds is feminine?
Nope – and you can learn too.
You just need a needle, some thread…
and a little know-how…
to refasten the button and be on your way.
No need for a tailor…or grandma's sewing machine.
Here's how to sew on a button by hand.
How To Sew On A Button: Before You Start
If your button goes missing – you first want to check if your shirt or garment has an extra button or two that's sewn in on the bottom of the inside. If not, you may be able to find and pick out a similar-looking button at your local supermarket or sewing store.
Then you must choose the color of thread to use. Try to match the color with what the remaining buttons on your clothing use.
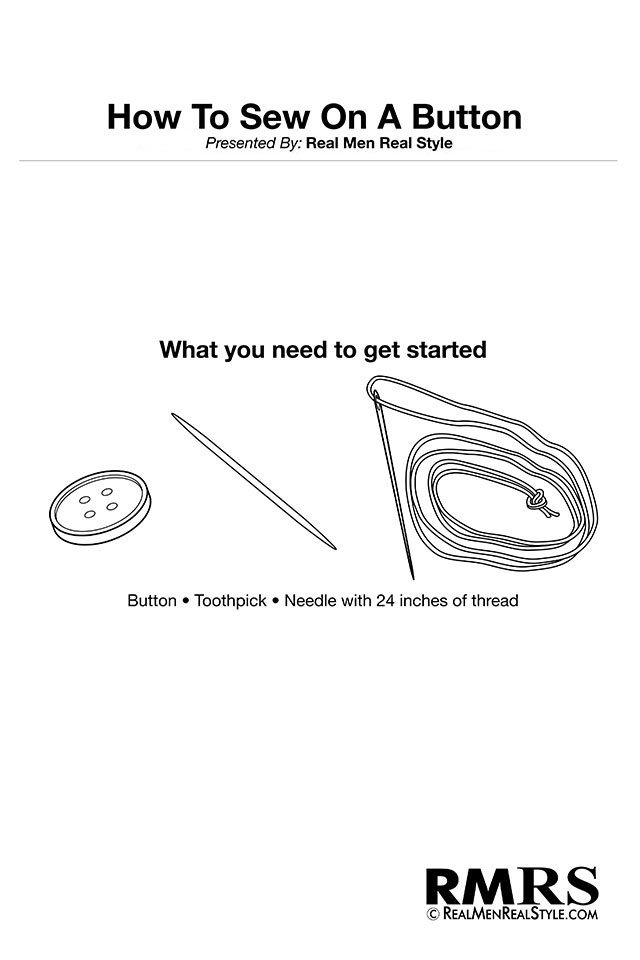
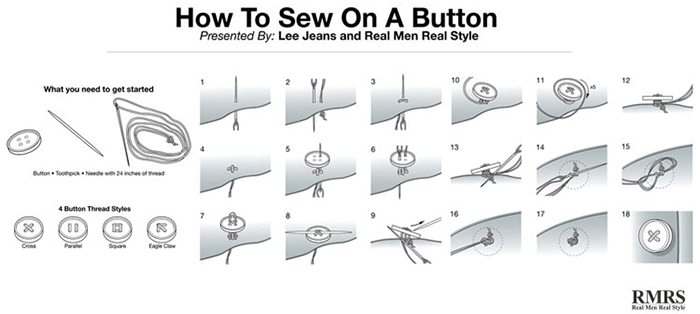
Here's a list of everything you'll need to repair a loose button:
- A similar or matching button (if not the original)
- Thread that has a length of 24 inches (of the same color)
- Two needles
- A pair of scissors
- A hand seamer
Use your hand seamer to carefully remove the loose button (unless the button has already come off).
Emphasis on carefully – since you don't want to poke a hole in the fabric!
Next, take one of your needles. Feed one end of your 24-inch thread through the eye of the needle.
This will be followed by pinching both ends of the thread together – pulling the needle towards the center. Make sure both ends are equal in length.
Wrap the thread around your index finger and form an X-shape. Pinch the X in between your thumb and index finger.
Then slide your index finger back – letting the thread roll forward. Bring your middle finger down in the front, pulling the thread with your other hand.
You'll be left with a solid knot for your new button thread which won't come undone – and is large enough to avoid slipping through the fabric.
Now it's time to start sewing…
How To Sew On A Button: Step #1
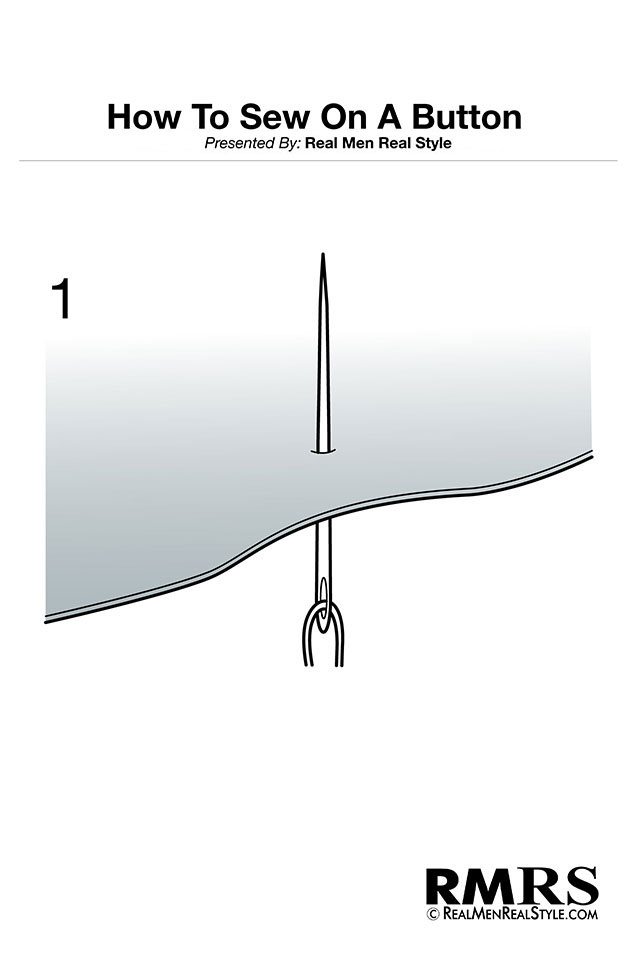
Starting on the back side, pass the needle through your fabric and bring it to the front. You should be carefully following 4 designated holes that match the holes on your button.
Step #2
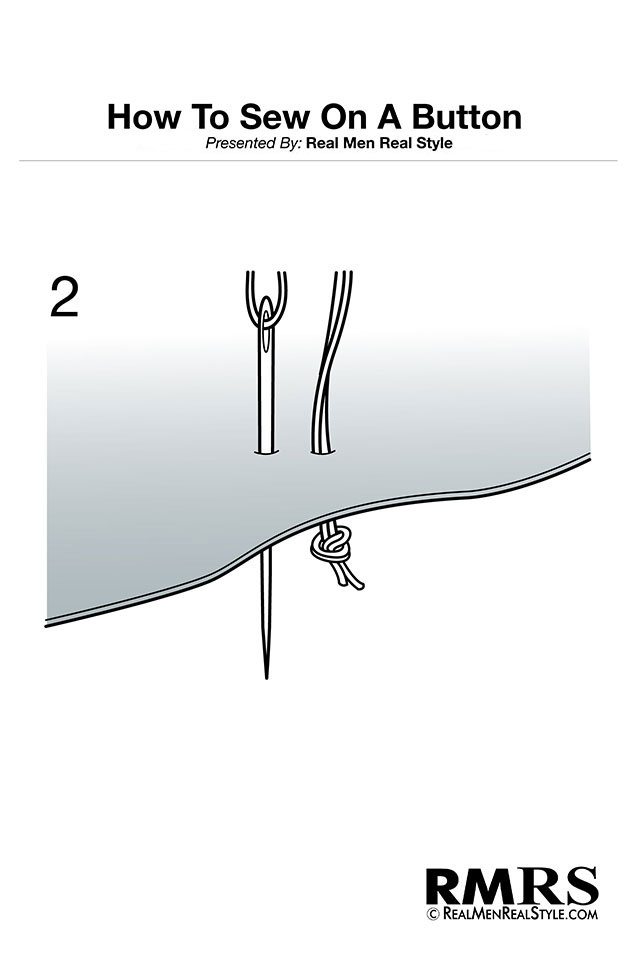
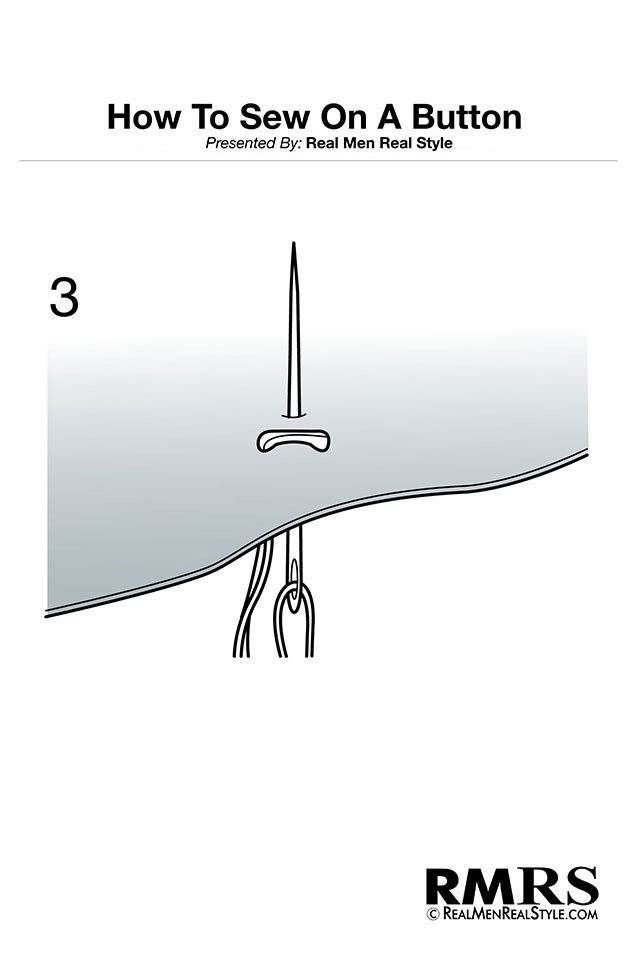
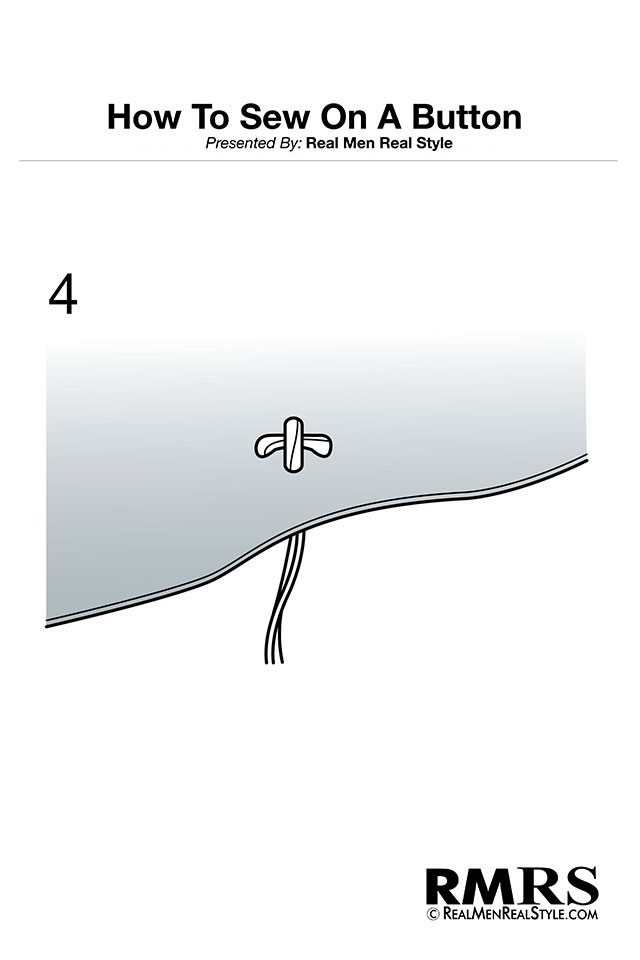
Continue passing the needle through the front and diagonally to the back, and then diagonally back to the front – until you form an X-shape on the fabric.
Step #3
Step #4
This newly formed X-shape becomes the precise mark for where you're going to sew the button.
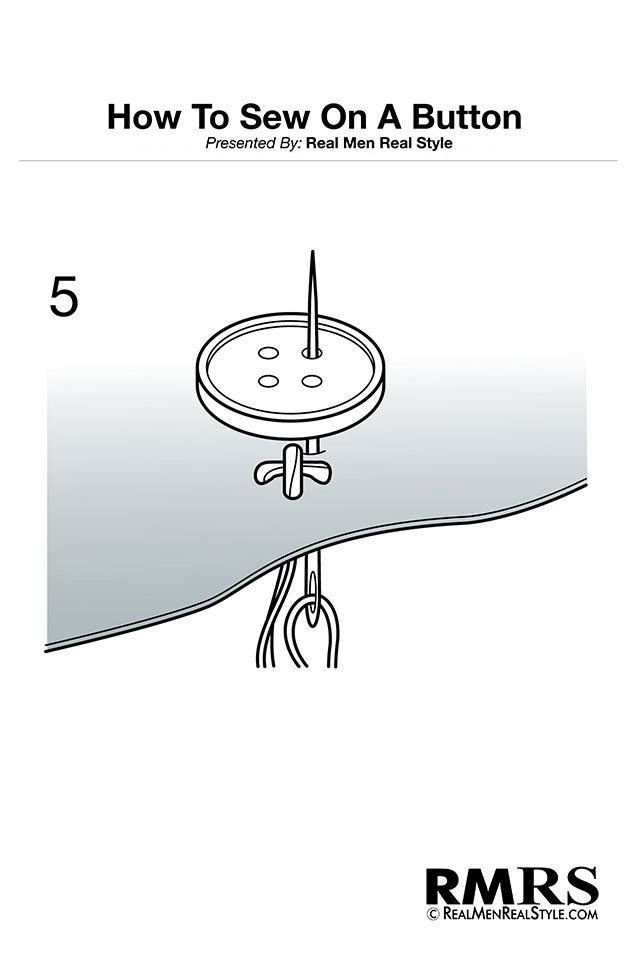
Now place the button on top of the X-mark. Then take the second needle and place it on top of the button.
This is a crucial part of forming the shank (part of the thread that's looped around under the button to make it secure and easier to fasten).
Step #5
Pass the thread through the back once again, going through the first of the 4 holes on the button itself – passing over the second needle. The string should head diagonally toward the second hole.
Step #6
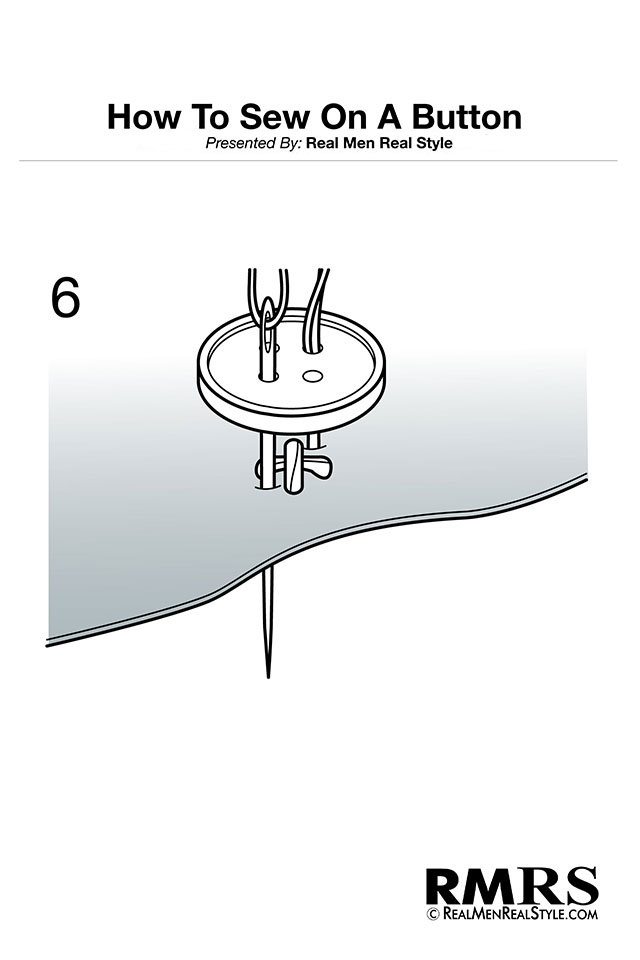
Push the first needle all the way through each of the holes on your button. Pull the thread taut every time. Follow the exact same pattern you used in forming the previous X-mark.
Step #7
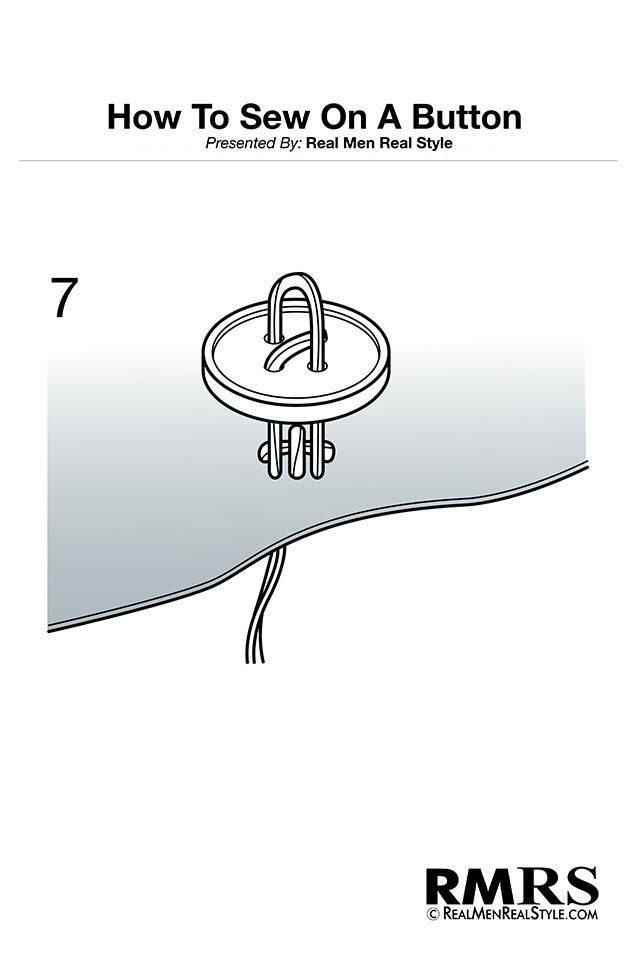
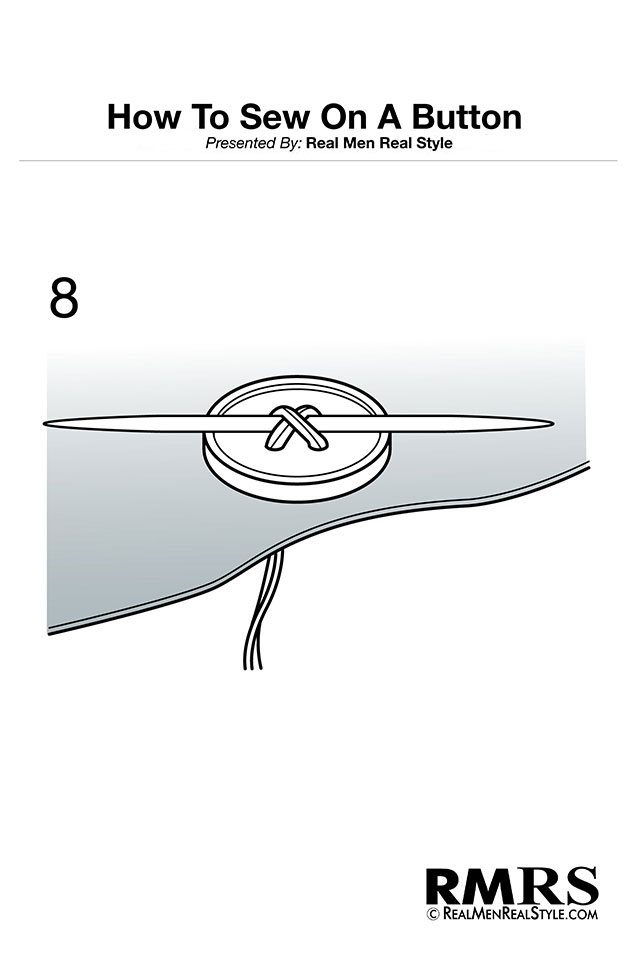
You'll need to go through all the 4 holes (both front-to-back and back-to-front) approximately 6 times.
For the first couple of passes, you'll have to hold the button and the second needle with your fingers. But eventually, both of them should be held tightly in place by the thread.
Step #8
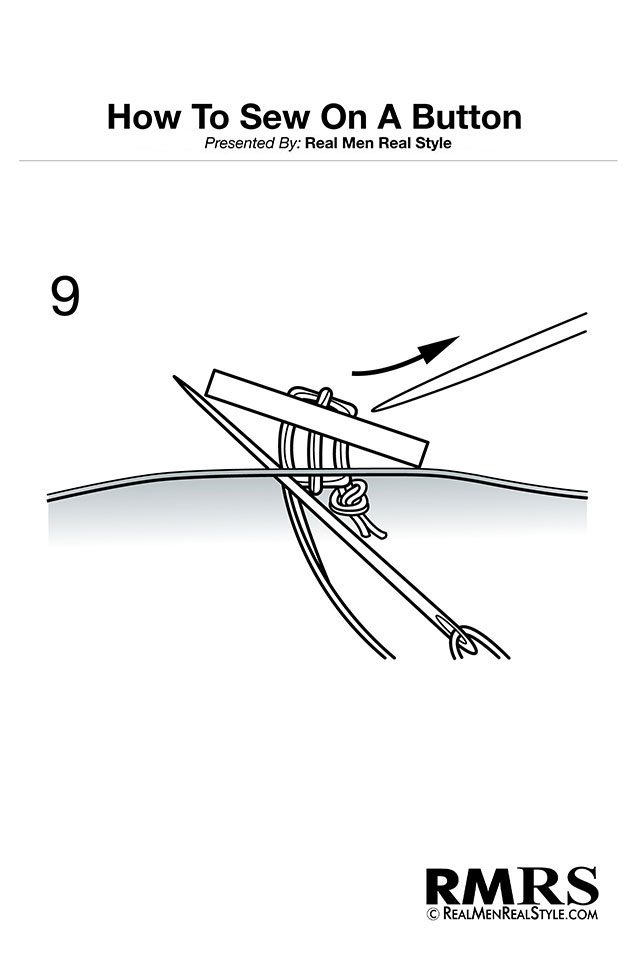
Step #9
Once you're done making all of the passes, pull the first needle all the way through the back. You can now remove the second needle – because it's time to create the shank.
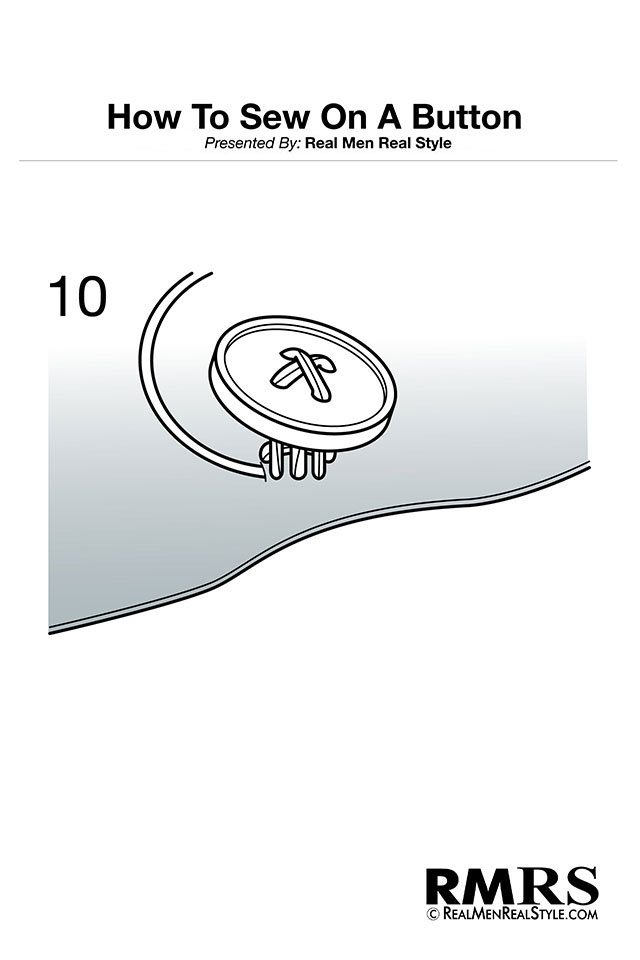
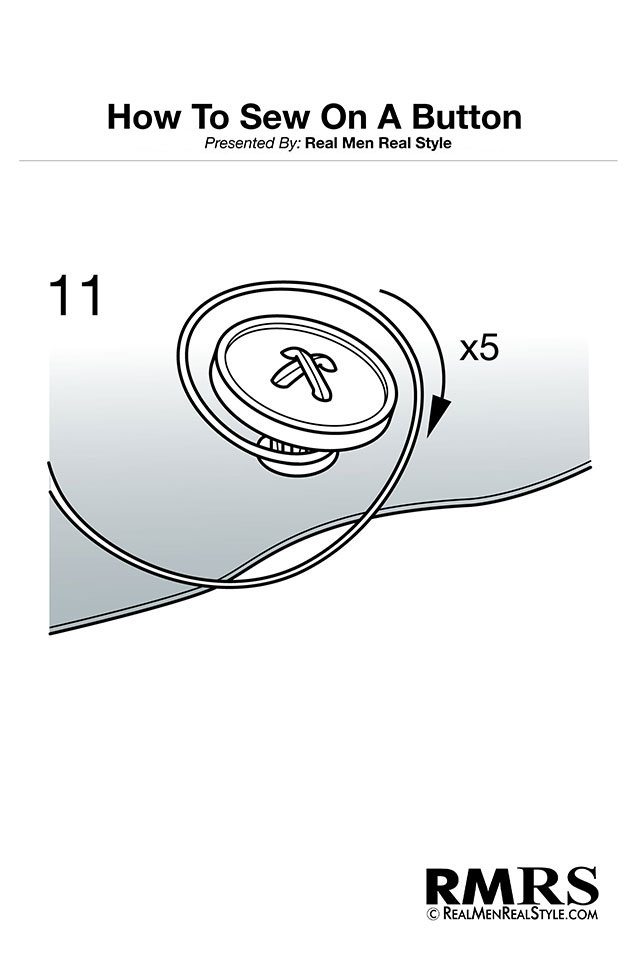
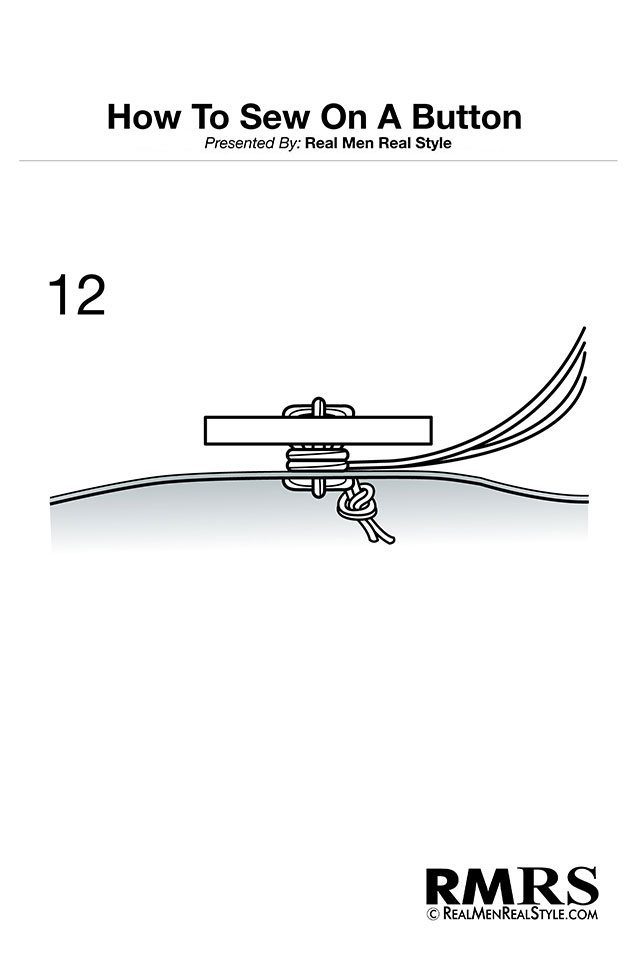
Wrap the remaining string tightly around the threaded area underneath the button. You should give it around 5-6 full loops in total.
Step #10
Step #11
Step #12
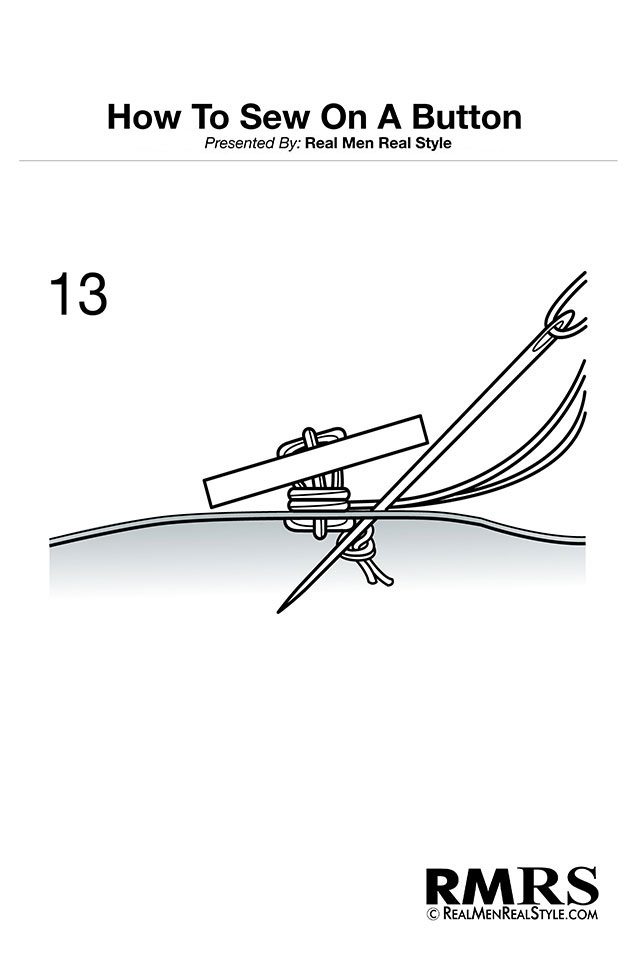
Step #13
It's time to finish the whole thing up with a few knots. Pull the needle through to the underside of your clothing once more.
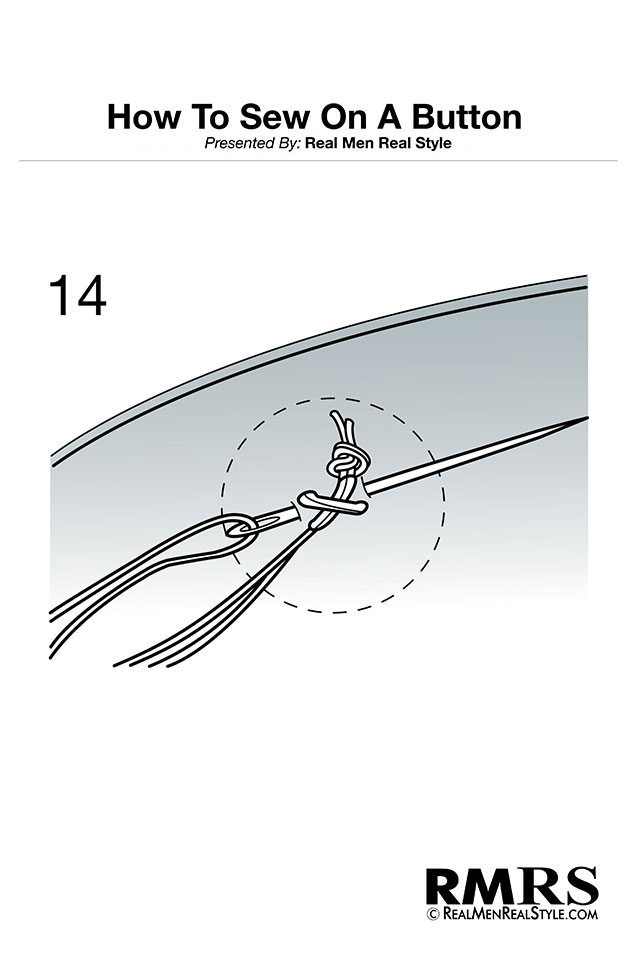
Step #14
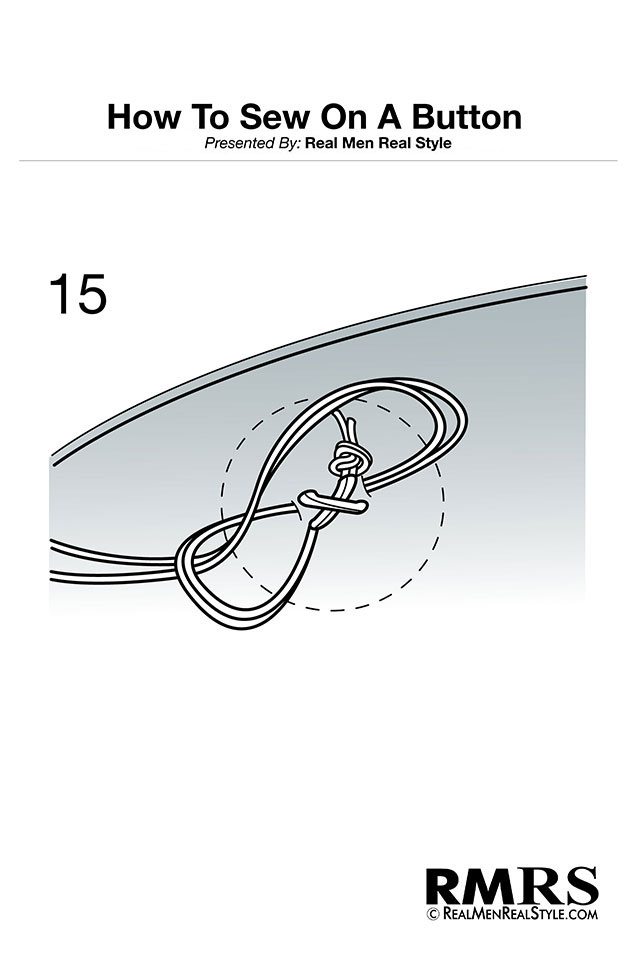
Step #15
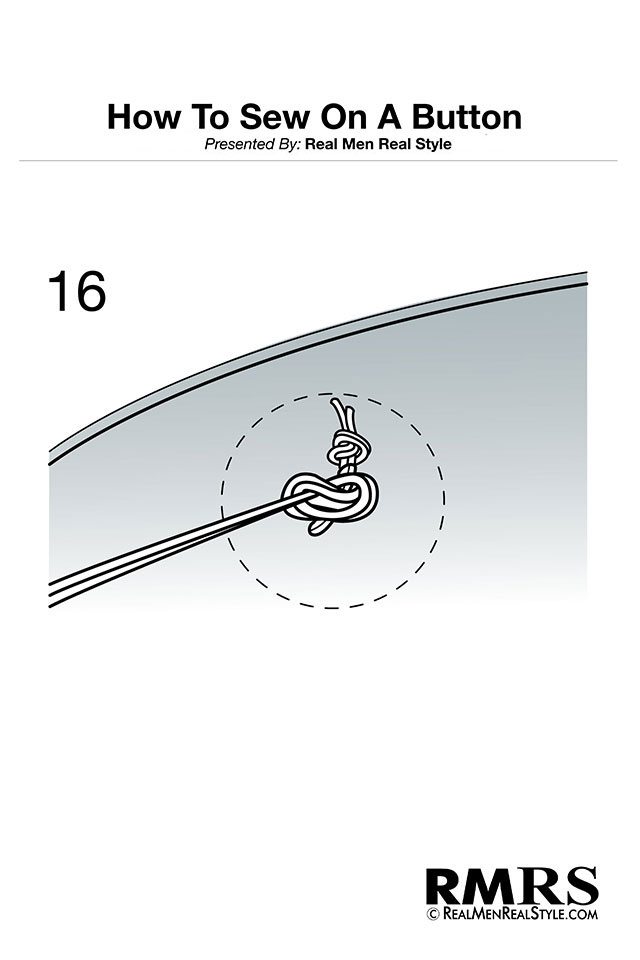
Create a good knot by passing the needle through the loop that was just formed at the back. Pull the string tightly.
Step #16
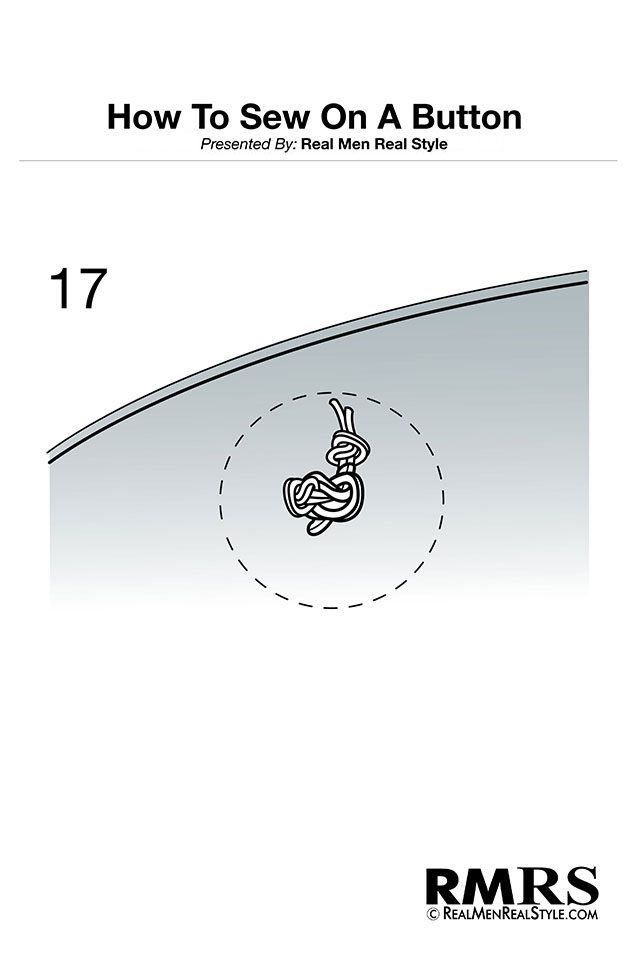
Double-knot the thread to keep it extra secure.
Step #17
Once you've done these final knots, use your scissors to cut off any excess thread.
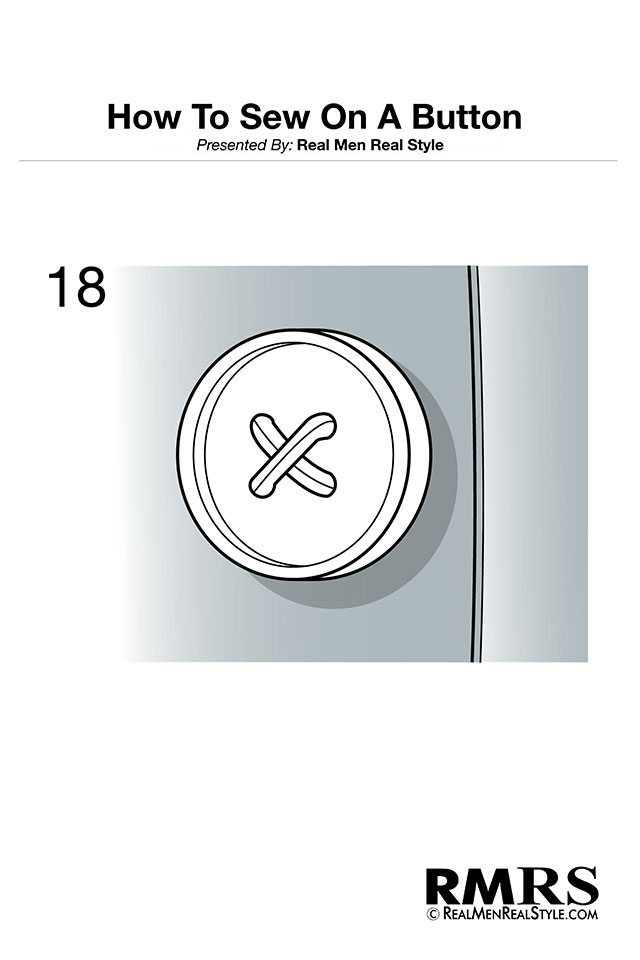
Step #18
Congratulations! You've just finished sewing on a button – and your clothing piece should be now looking good as new.
Click HERE to view the FULL Infographic – How To Sew On A Button
Tips & Reminders:
- Ensure that every single time, you're pulling the thread nicely and tightly through. Loosely done threads tend to look sloppy in the end – forcing you to restart the whole process.
. - While traveling, if you spot a loose button on your shirt or you need a sewing kit – ask the hotel you're staying in for an emergency kit. Most hotels have one readily available (and it's FREE to use). This kit provides the tools for doing these repairs quickly.
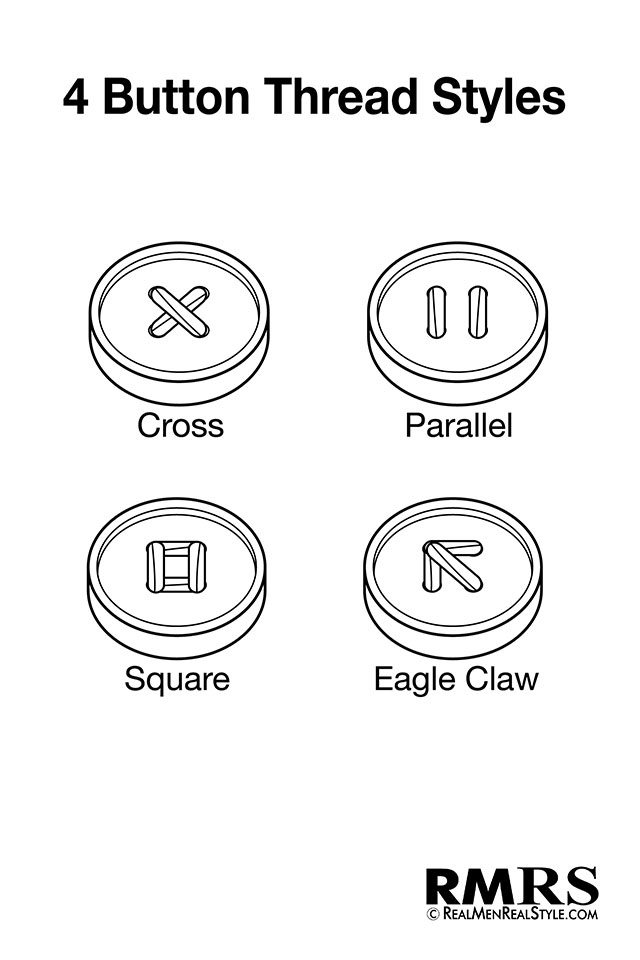
. - You don't necessarily have to follow the cross (X-shaped) style of threading. There are actually 3 other techniques you can use:
Click Here To Watch The Video – How To Sew On A Button
Click Here To Watch The Video – Repair Loose Buttons Quickly By Yourself
